By Mary B
With the holidays coming up, not to mention just regular household decorating becoming an art since many are staying in homes they can’t afford to move out of, putting the final touches on a “showcase worthy” home doesn’t have to break the bank…or even come close.
Here are two tips, used by real people (in this case my sister-in-law and college roommate) that can make your home look as if it belongs in the latest Pottery Barn catalog, and no one will know you hardly spent a thing.
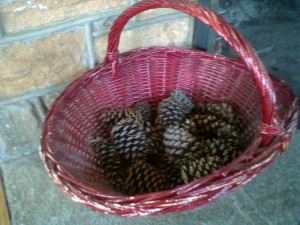
PINE CONES: This tip costs nothing more than time. Look through any high end store catalog around the holidays and you will surely see bowls and baskets of pine cones strategically placed. Many stores sell them and charge crazy prices. Even eBay and Amazon have them, and while cheaper in the $10-$20 range, still an expense. Instead of buying these cones, just spend an afternoon either walking around your backyard or in your local park collecting them. In 15 minutes you could have more than enough to fill several bowls!
Make sure you examine closely before you bring these inside so as not to include any un-wanted guests jumping on board.
And if you live in an area that has a lifetime supply of pine cones, think of collecting extras and selling yourself on eBay as the holidays get closer!
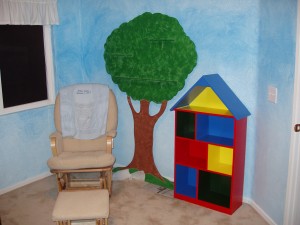
BEDROOM ART: While visiting my college roommate I noticed the wooden tree that was lifelike in her daughter’s bedroom. It was a wooden cut-out that she and her husband had then painted. It was less than an inch thick, but about 4 feet high. It had a few shelves on it as well, but the beauty of this tree is that it added a unique touch to Anna’s room and made it clearly her own.
When I remarked about it, Jennie said they had seen it in a catalog for “hundreds of dollars” but her husband decided to take a weekend and just make it himself. It wasn’t hard. Simple plywood, sand paper, paint and boom!
The tree is next to Anna’s bed and brightens the whole room.
If trees aren’t your thing, you could easily make a truck, flower, bird or whatever your imagination comes up with. Have your children help paint too and it becomes a family project, and heirloom, everyone can enjoy.
Keep tabs on all the hottest deals by subscribing to our FREE daily newsletter and follow us on Facebook! Looking for more coupons? Check out our Coupon Database or visit Coupons.com, Red Plum and Coupon Network! This post may contain affiliate links.


Bake the cones to kill any insects. Heat oven to 200 degrees Fahrenheit. Line a cookie sheet with aluminum foil. Place the pine cones in a single layer on the cookie sheet. Leave 1 to 2 inches between each cone so the heat penetrates evenly. Leave the pine cones in the oven for 30 minutes or until they have fully opened. Remove the pine cones from the oven. Place the pine cones on newspapers as soon as you remove them from the oven. Allow them to sit for two to three days before using in craft projects. eHow.com
Dee-great tip!!